Thursday, December 10, 2009

Becoming A Make-Up Artist: Liquid Liner

Liquid liner is quite a tricky part of make-up. It all depends on your eye shape and eyelids.

My eye shape isn't really that great for wearing liquid liner as the top lid 'droops' down when it gets to the outer corner and then the end of my lid only has a little bit of skin exposed.

When trying it on yourself the first time I think there is a couple of hints that would help you out.

  1. When drawing the line across your eye lid, don't make the line too curved as your eye will naturally round up the line as it opens.
  2. Experiment with what thickness suits you. You don't want it look like you're half asleep lol.
  3. Experiment with how the flick at the end will be when you open your eye.
THE FLICK:
This one all depends on your eye shape. My eyes are really round so it is best for my shape if I draw a straight line as the eyelid will automatically curl it when I open my eye.

As with what I did here, I didn't extend the flick longer enough and I didn't get it in the right place. But this was the first successful lining I've done so I was pretty pleased at the time haha.

The main trick is to practice in your mirror whenever you have spare time.

I RECOMMEND:
The liner I used here was MAC's ever so popular Black Track gel liner. It glides on so easy, doesn't smudge and is really great with oily lids. It doesn't tend to flake off either.

Another MAC liner that I have and is good is Liquid Last in Point Black. Its a little bit more tricky for me compared to Black Tracks. I find I always apply it too thick and takes a little while to dry.

The brush I use is a 209SE. From a little gift bag with the Magic, Mirth and Mischief collection that contained the brush 209SE, Black Track, Shimmer-time pigment and a mini Zoom Lash. I find the brush is perfect with its small handle and after using black tracks with it it dries it with a nice fine point which keeps it in great shape.


Wednesday, December 9, 2009

Zoya Hot Lips : Baby Doll


Don't get sucked in by the cute colour of pink in this tube!


Babydoll applies more like a lipstick in a way. It isn't the least bit sheer.


Babydoll is hard to apply evenly, gathers in places, doesn't spread well.


Please, as much as I don't want you to look at them- just look at the photos.
What a mess! What the hell is this Zoya?!

Monday, December 7, 2009

China Glaze OMG


Just thought I should post these before they get forgotten about hehe.

This is China Glaze's OMG from the OMG Holographic collection. It is my go-to holo polish for when I want a holo design when konading. I don't really enjoy wearing it as a colour.

This is just two coats here. It is very pigmented unlike China Glaze Sexagon or OPI DS Shimmer.


Sunday, November 29, 2009

OPI Suede Collection 2009

Hey guys! Here are the OPI Suede polishes on a display thing :D

Enjoy!

On the left we have Russian Navy Suede, Ink Suede, Lincoln Park After Dark Suede, We'll Always Have Paris Suede, You Don't Know Jacques! Suede, Suzi Skis In the Pyrenees Suede.


Overall the formula is really good for matte polishes. A little less shrinking with these ones I found compared to the Mattes OPI released earlier this year.

I loved every single shade when I first saw them and I loved them even more in real life :) The finish is so different to everything else and they're crazy sparkly with top coat.

Although I have a feeling Zoya's Loredana may be similar to Suzi Skis in the Pyrenees Suede. There is also Zoya's new matte Harlow which is quite close to We'll always have Paris Suede.

Thursday, November 26, 2009

How To: Depot Lipstick or Balm

So my lippie Blow Dry was giving me a little trouble, it was quite mushy and scraping on the edges of the container... So I decided to depot it!

And then I got a little carried away...


How do you depot a lipstick you ask? Easy peasy!

YOU WILL NEED:
  • Oil Burner OR Candle
  • Lighter
  • Big Spoon
  • Small Container
STEPS:
  1. Slice the lipstick up into smallish slices on to the spoon. This will help it melt faster.
  2. Light the candle and hold the spoon over the candle. It can take a few minutes - depends on the lippy. Don't hold it right over the flame so it boils!
  3. Once it is all liquid, pour it straight into your container or lip palette and let it set. It doesn't take that long.
  4. You're done!
I did a couple of other colours too because having so many different lipsticks in my kit makes it tricky to see all of the colours to judge whats best for the client. Mum and I only picked up a few pots today but I think we will be getting a few more.

Monday, November 23, 2009

Becoming a Make-Up Artist: Glamour Make-Up One

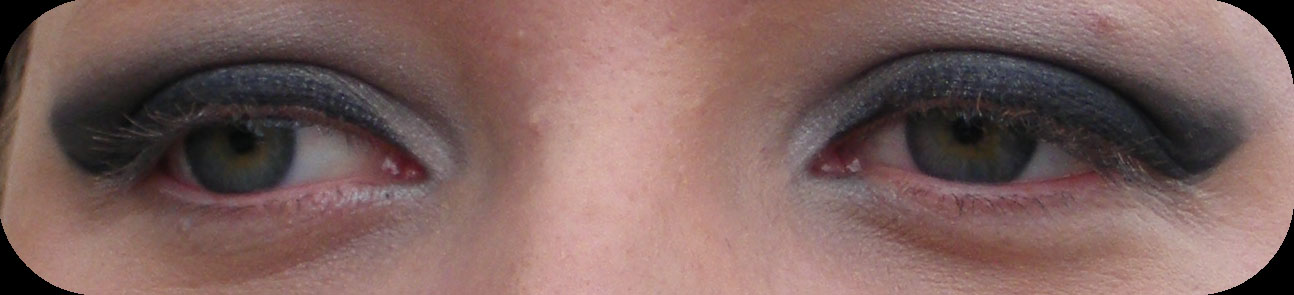
My sister so kindly let me practice Glamour make-up on her as I have an assessment coming up really soon.

This is what we learned as 'Glamour One', strong eyes and nude lips. Next up will be 'Glamour Two' which is strong lips and nude eyes, followed by 'Glamour Three' which is strong lips and strong eyes.

The colours I have had no names! It was just a generic shimmering white, silver and black that was used.

PRODUCTS USED:
  1. Soft Ochre Paint Pot (MAC)
  2. Black Track Fluidline (MAC)
I was quite proud of myself! I know I will probably look at it later down the track and wonedr what the hell I was doing... But I had fun and was pleased with it :)

Thursday, November 19, 2009

OPI DS Mystery


I'm really sorry NJ has been more make-up lately but it's my passion at the moment and I don't have the time to take many nail photos at the moment. But! Christmas break is coming up really soon and summer is almost here so should be heaps of time to take photos :D


Here is one of OPI's new Designer Series polishes, Mystery.

Mystery is really beautiful! On the first coat it is very purple and it's a shame that purple-ness gets taken away by the second coat.

I guess you could do one coat over a purple?

The formula was a little runny but it is easy to forgive with all those lovely gold glitters!

You may have to enlarge these pics :D