Showing posts with label Nude. Show all posts
Saturday, August 29, 2015
OPI Venice Fall Winter 2015 - Tiramisu For Two
Tiramisu for Two is from OPI's latest collection, Venice. Anybody who knows me knows that nudes are one of my absolute favourite shades to wear. Nude shades always look so crisp, clean, fresh, and are appropriate for every occasion. The formula is absolutely fantastic on this one, only needing two thin coats for coverage. Tiramisu reminds me of the three nude shades that came out with their Japanese collection a few years ago.
Saturday, August 8, 2015
Jamberry - Upper Eastside
The Look:
A smart, sophisticated, and simple nail look using Jamberry's nail wraps. To get this look I started with two coats of Checkmate, a nice smooth beige, I then used the Upper Eastside Jamberry wrap on my ring finger. After the polish and wrap were dry, I then placed a black stud upon each nail using my dotting tool and a tiny bit of base coat. I then used a coat of top coat over the nail polish.
Products Used:
- Revlon Checkmate
- Jamberry Upper Eastside
- Black studs
Points to Note:
The Jamberry wrap requires heat and pressure to adhere tightly to your nail. I suggest using the baggie method with heat 2-3 times so the wrap really shrinks on to your nail.
Links:
Black studs
Upper Eastside Wraps
Jamberry Australia/New Zealand
Maureen's Jamberry Store
Youtube Tutorial
Maureen sent me these samples of Jamberry to try.
Wednesday, August 5, 2015
Nail Juice - Saccharine
Introducing Nail Juice's COTM for August - Saccharine! A soft dusty rose that sparkles in the sunlight. Saccharine is sprinkled with holographic shreds and a fine holo shine.
Links:
Monday, November 24, 2014
Revlon Gel Envy - Checkmate
Checkmate, my very first Gel Envy. Where it all began! I looked into the Gel Envy line because I was tired of my little nails never getting to grow. Between Checkmate and High Roller (dark purple) - I wore these two shades weeks on end. A month later here I am, very happy with my nail length.
Two smooth as butter coats. Another beautiful formula in the Gel Envy line. Checkmate is one of my favourite nudes of all time.
The perfect shade for when you're trying to grow your little nails out!
See you again shortly with more Gel Envy!
Monday, January 20, 2014
Nail Juice: The Golden One Review
I have another new Nail Juice to show you! This beauty is The Golden One. A delicate peach with golden sheen. This polish really is the Golden One, it suits every skin tone! My skin can easily be made to look very yellow, and my Mum's skin, red. But this just looked stunning on each of us. Here it is shown on my Nana's nails. This is two smooth coats.
You can have your very own bottle of The Golden One! Follow the links below :)
Email - nailjuicepolish@gmail.com
Thank-you for reading :)
Labels:
2014,
Gold,
Indie Brand,
Nail Juice Polish,
Nude,
Peach,
Pearl,
Shimmer,
Work Appropriate
Monday, November 4, 2013
OPI I Love Yokohama
This is OPI's I Love Yokohama from the Yokohama collection. I used two coats here, as you can see it is quite a sheer polish and I don't believe it is to be worn opaque. Unless you have a pretty nude underneath!
Wednesday, October 23, 2013
OPI Did You Ear About Van Gogh?
Today I have Did You Ear About Van Gogh? which is from OPI's Holland collection which was released last year. Van Gogh is a putty coloured creme with a nice formula. This is two hassle-free coats.
Thursday, October 17, 2013
Zoya Godiva Pixie Dust
Today I have Zoya's Godiva to show you! I really love this one for when I need a mani to last good few days and to show barely any wear. It doesn't look very sparkly here, but it is in real life! I love how I can forget I'm wearing it, yet get enjoyment from wearing it.
Godiva is a part of Zoya's Pixie Dust range. They're much like the Liquid Sands and textured polishes other companies are releasing. Two coats are worn in these pictures.
Link Roundup
Thursday, October 10, 2013
Glitter Gal Nude Holo
Here is Glitter Gal's Nude in all her glory. Yes I probably did take too many photos!
Three smooth effortless coats. I forgot how gorgeous the Glitter Gal holo formula is!
This last pic was taken with the flash on, so you get to see a few more sparkles!
Link roundup
Wednesday, September 18, 2013
piCture pOlish Beige Comparisons: O.P.I, Zoya
This is a comparison or versus post for piCture pOlish Beige. These are the colours I had closest to Beige; Did You Ear About Van Gogh, Samoan Sand, and Avery.
Pictured above is OPI Did You Ear About Van Gogh, OPI Samoan Sand, Zoya Avery and piCture pOlish Beige.
So as we can see, Beige is lighter than each of these shades; which makes it look slightly more chalky than the softer shades Samoan Sand and Avery. In comparison to Beige, Van Gogh is more green-toned while still holding the more chalky like look as Beige. Samoan sand is more red-toned and is much sheerer. Avery has more yellow in it, and in the midst of not quite chalky looking but not sheer either.
Which is your favourite? Or do you have a polish that is similar to Beige?
Link roundup:
- Purchase Beige from piCture pOlish
- 2013 Blog Fest nail art featuring Beige
- Patterned gradient using Beige
- 2013 Blog Fest nail art featuring Beige
- Patterned gradient using Beige
Tuesday, September 17, 2013
piCture pOlish Beige
Today I have piCture pOlish Beige to share with you! Beige is a light nude creme that requires two coats of polish to achieve opacity. The formula is very nice and smooth, a little on the watery side, but easy to control. Tomorrow I will have a comparison post with other like polishes :)
Check out the links below to see more posts that feature Beige!
Link roundup:
Sunday, September 15, 2013
Nail Mail! Pt. 2: Golds & Neutrals
Welcome to part one! Here we have Zoya's Avery, who is from the Feel collection 2011; Zoya's Godiva who is from the Pixie Dust collection 2013; SOPI's Under My Trenchcoat, OPI's Funny Bunny who is from Garden Party 2007; and lastly SOPI's Keep Me On My Mistletoesies.
Shown here from pinky to thumb, with two coats each, is: Keep Me On My Mistletoesies, Funny Bunny, Under My Trenchcoat, Godiva, and Avery.
Labels:
Creme,
Foil,
Gold,
Matte,
Nude,
O.P.I,
Pixie Dust,
Sephora by OPI,
Shimmer,
White,
Work Appropriate,
Zoya
Wednesday, September 11, 2013
Nail Art: Gradient Pattern
Today's pretty manicure is made up from a base of piCture pOlish's Beige, dotted with OPI's Done Out in Deco for the purple, and Butter London's Sprog for the periwinkle, and MakeupStore's Young for the light blue.
Shown here is OPI's Done Out in Deco, Butter London's Sprog, and MakeupStore's Young.
Link roundup:
Labels:
Blue,
Butter London,
Makeup Store,
Nail Art,
Nude,
O.P.I,
piCture pOlish,
Purple
Wednesday, August 28, 2013
BL Bumster vs. SOPI Neutral Beauty
To follow on from yesterday's post of Neutral Beauty, today I have a comparison against Butter London's Bumster! Two coats of each, both fantastic formula.
See what I mean about having just the little bit more contrast? While both colours are beautiful on their own, I much prefer Bumster against my skintone.
Tuesday, August 27, 2013
SOPI Neutral Beauty
This is Sephora by OPI's Neutral Beauty. It is a yellow/mustard toned nude creme. Two coats here, impeccable formula. I however feel that it would suit someone who would have greater contrast between this shade and their skin colour. This is my 'tan' lol!
Monday, July 29, 2013
piCture pOlish Blog Fest 2013 - Celebrating the Year of the Blogger!
pIcture pOlish put together a 
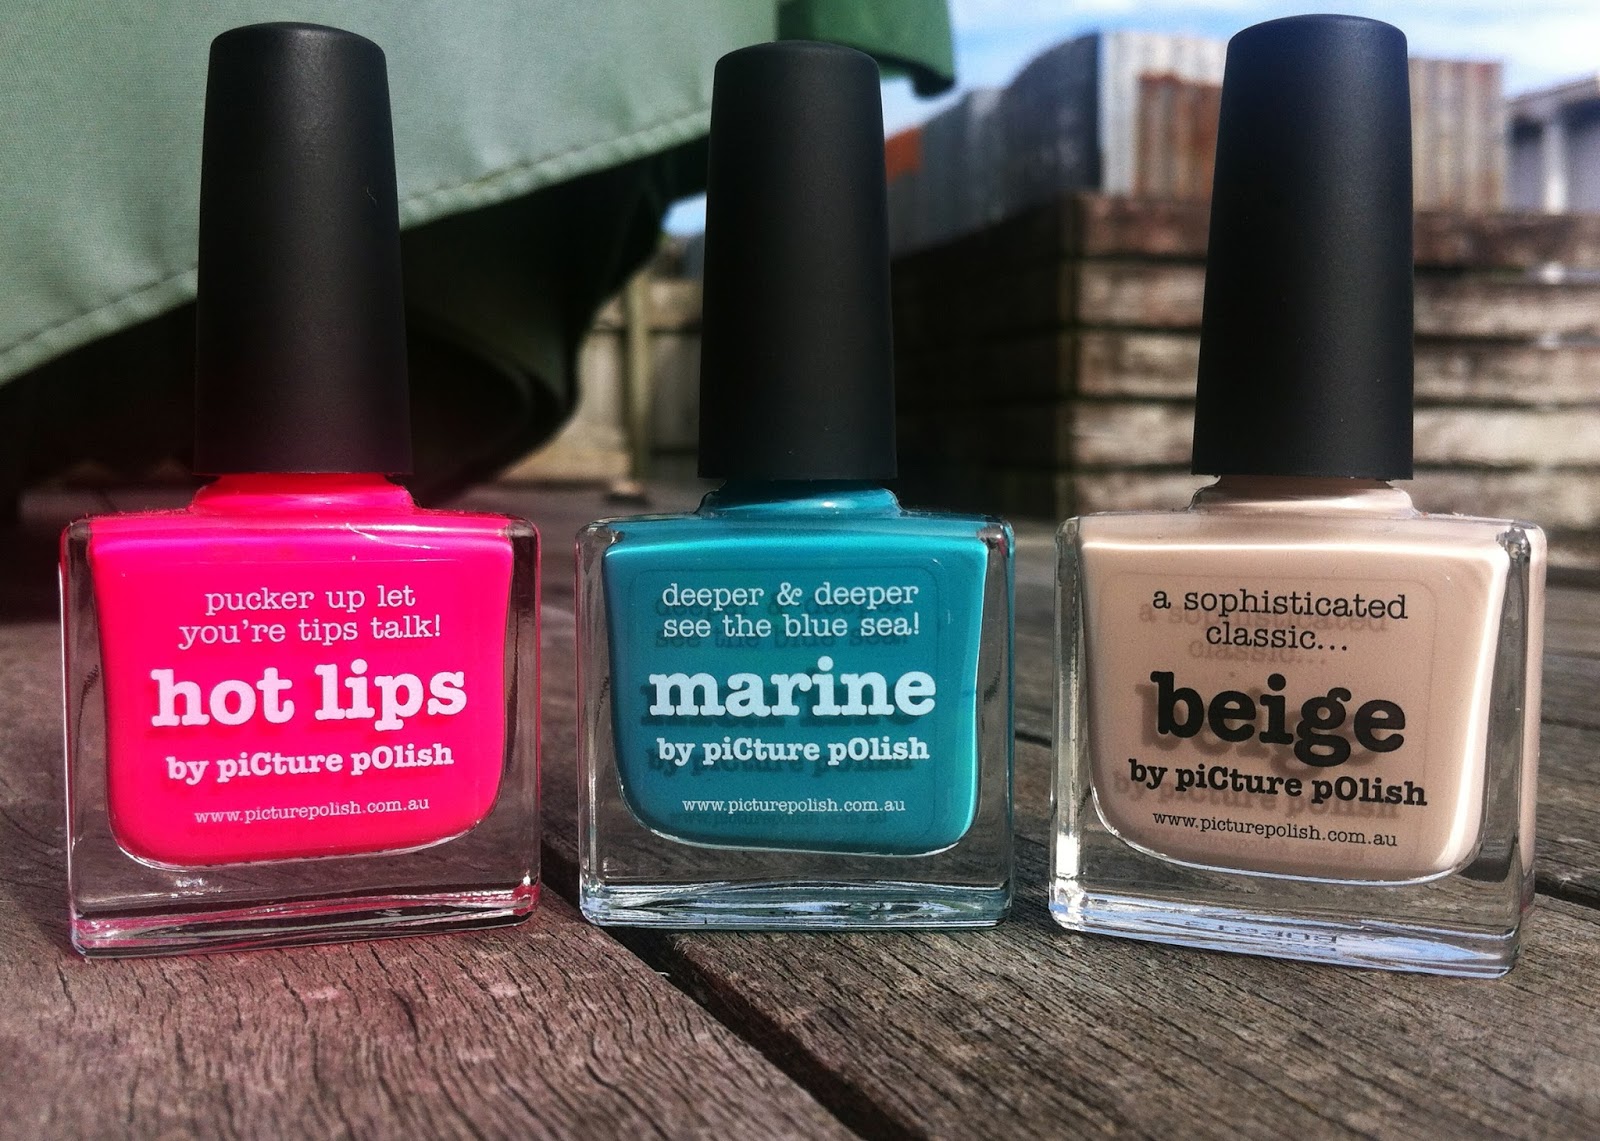
Blog Fest for 2013, which meant that they sent you three colours to use and you had to create some nail art with them! The colours I was sent were Hot Lips, a beautiful searing fuchsia, Marine, a decadent teal creme, and 
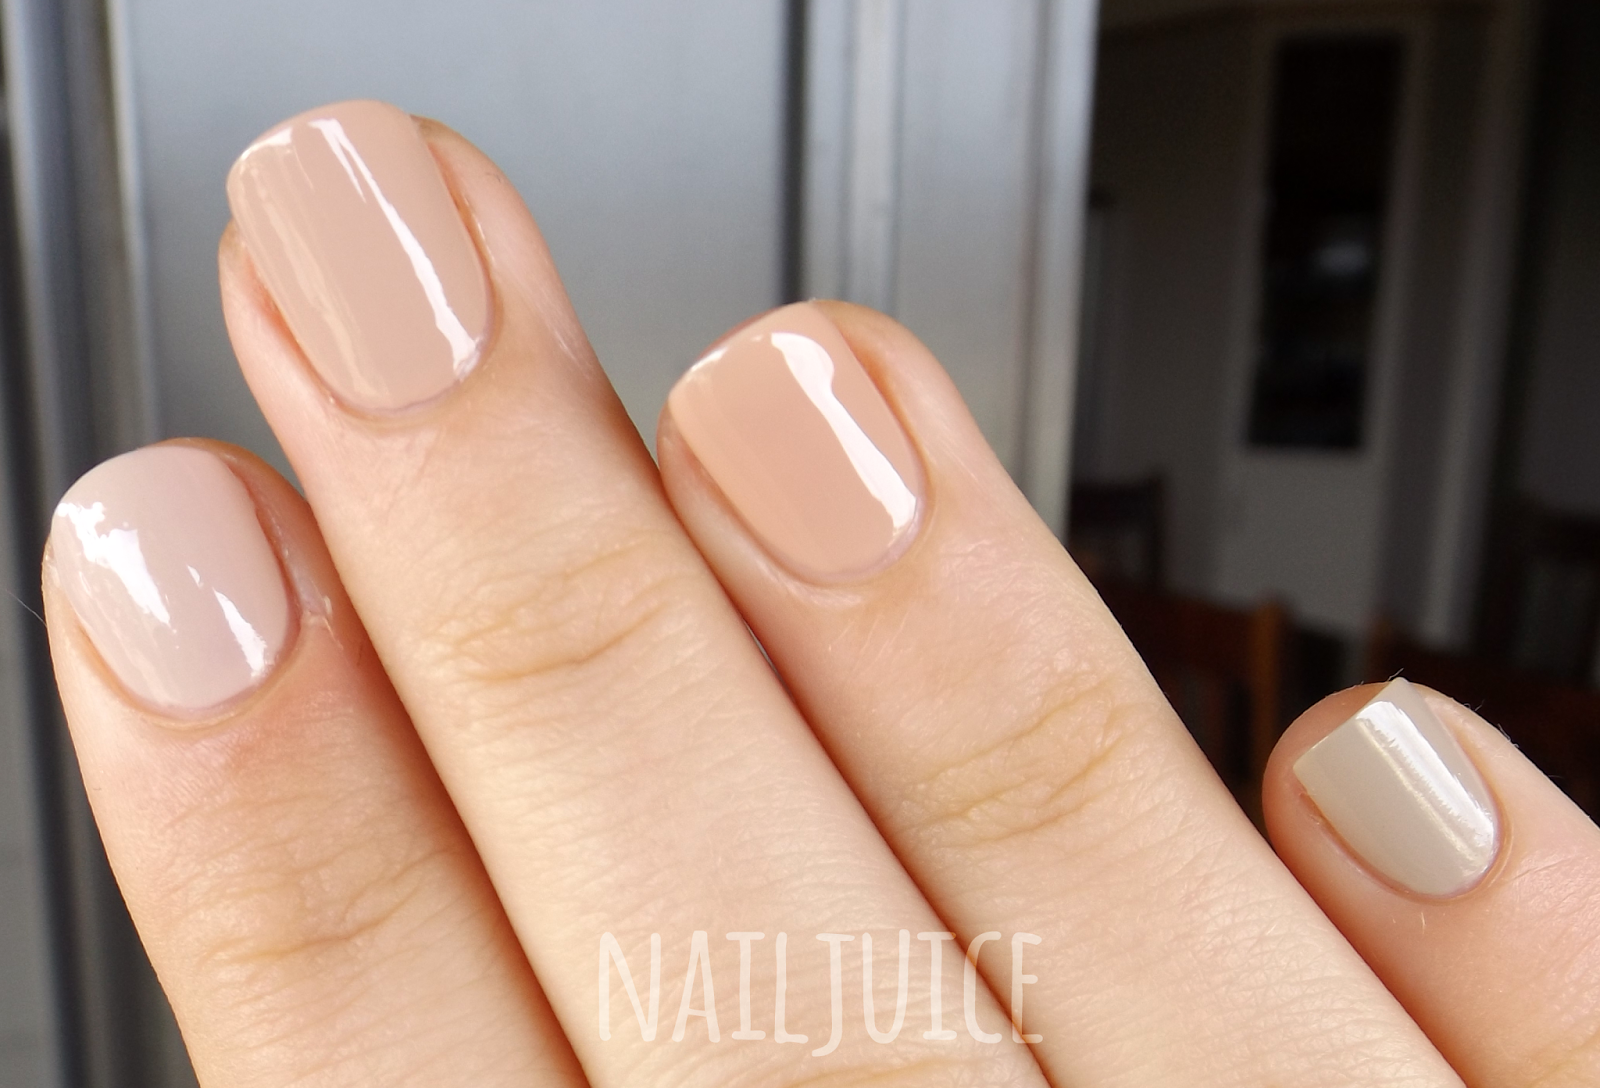
Beige, a picture perfect nude.
At first I was a little bit stumped with how my three could work together as they were so different from one another! I had a nude, a neon and a teal! But the secret was to actually combine them. And by that I mean to mix the smallest amount of Marine in to a dab of Hot Lips to create different shades from thin one another. I also used tiny amounts of black to darken Hot Lips, and the more purpley Hot Lips for the middles of the flowers.
I have to say, Hot Lips is high on my top 20 list of fave polishes. She's just so bright it's impossible to feel sad when looking at that beautiful pink on your polished nails. I have worn it so many times, I couldn't wait to use it in this manicure!
So in order to create this manicure follow these steps:
- Paint two thin coats of Beige to create the base colour.
- For the fingers that you wish to gradient, paint a thin line of Hot Lips on the tips of these fingers.
- Once dry, paint a blob of Beige and Hot Lips together on a sponge.
- Dab the sponge in the middle of the thin Hot Lips line and the Beige nail.
- Repeat to get a smoother blend.
- For the fingers with flowers, use a small paint brush to paint the flowers in Hot Lips.
- Use Marine for the leaves of the flowers.
- Add a tiny amount of black to Hot Lips to create the darker inside of the flower.
- Top coat your beautiful creation, you're done!
Blog Fest Awards!
If you liked my design, pop 'Nail Juice' in to the comments section here:
https://www.picturepolish.com.au/index.php?route=information%2Finformation&information_id=10
Check out all nail art posts here!
pOlish On-line Store Facebook Twitter Pinterest Instagram
https://www.picturepolish.com.au/index.php?route=information%2Finformation&information_id=10
Check out all nail art posts here!
pOlish On-line Store Facebook Twitter Pinterest Instagram
Subscribe to:
Posts (Atom)