Showing posts with label Nail Art. Show all posts
Sunday, August 16, 2015
Jamberry Nail Wraps Sample Sheet - Subtle
Jamberry is releasing in Australia and New Zealand on October the 1st. With having loved the nail wrap designs, I gave the sample sheet a try! This is one side of the sheet, what I call the 'subtles'. This side of the sheet came with a zebra print, plaid, nude to white ombre, black and white floral, as well as a clear/white striped design.
The wraps are fairly easy once you have your system in place of getting them on. I highly recommend doing some research online first because there are so many different ways of applying them. I used tweezers, a hair dryer, and a small plastic baggie. This method was fairly easy and pain free. Although it is time consuming, I made sure to do it while I was doing other stuff on my computer. I will post a tutorial later this week.
What I really liked was how it doesn't need to dry like polish, so I was able to do little jobs here and there when I needed without worrying about messing up my nails. However in saying that, the sticky side of the wrap does need time to set. I've seen people recommend doing your wraps before bed as this gives the wraps ample time to set. Otherwise they can come off or lift quite easily when in contact with water.
Another point to note is that because the wraps come presized, you may need to trim them down, or simply deal with the inaccurate sizes.
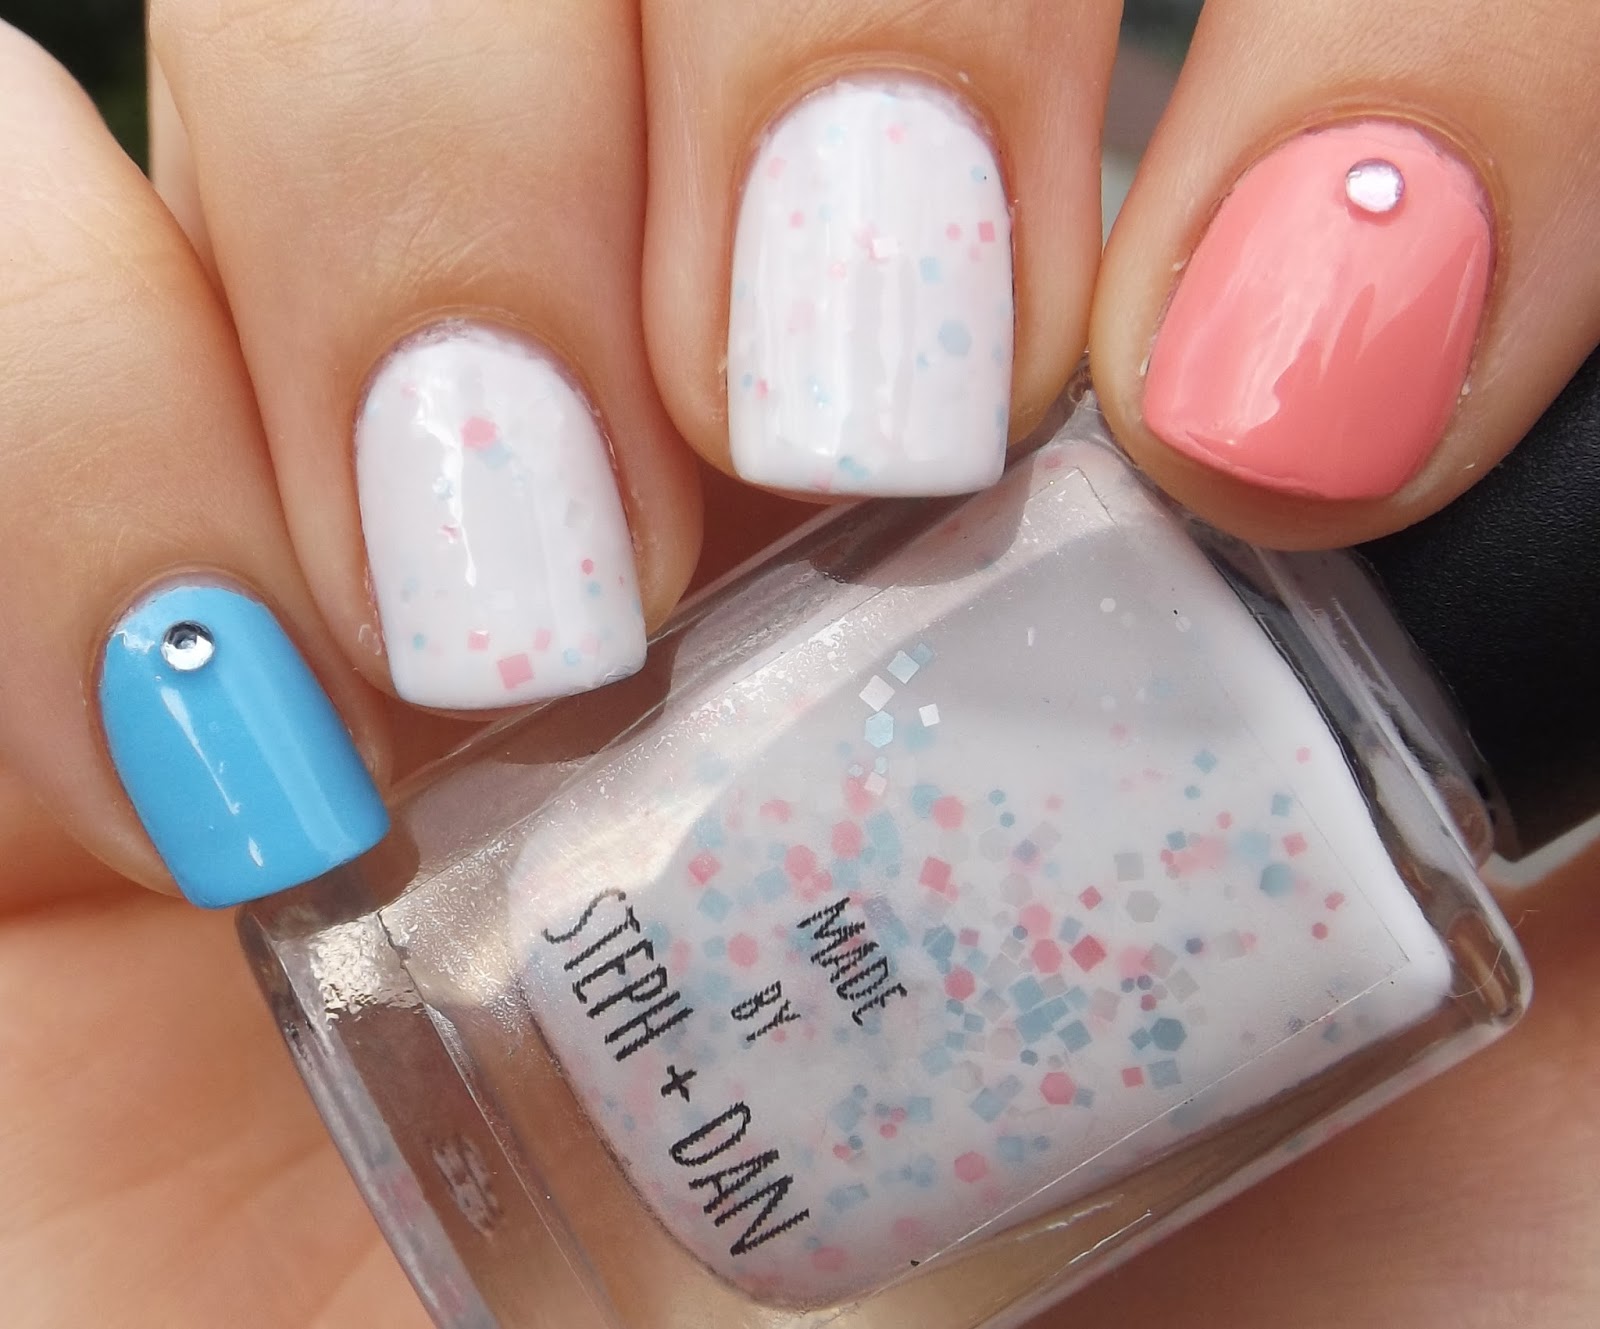
My favourite part of the Jamberry wraps are the designs. They are just simply beautiful. I also especially loved the clear ones, like the white stripes on my ring finger here. This means that you can have a negative space mani (showing your bare nail underneath), or you can layer them over a different wrap or polish to create an interesting look.
Links:
Other Jamberry look
Jamberry NZ/Aus
Tuesday, August 11, 2015
Nail Art - Neon Spike
The Look:
This look starts of with two coats of Haze to create our neon purple base colour. Then, with my dotting tool I place small amounts of base coat around the base of each nail. I picked up the spikes with my dotting tool and placed them in a formation on three on each nail. I then sealed the design with my top coat.
Products Used:
Links:
Black spikes
Nail Juice Haze
This look starts of with two coats of Haze to create our neon purple base colour. Then, with my dotting tool I place small amounts of base coat around the base of each nail. I picked up the spikes with my dotting tool and placed them in a formation on three on each nail. I then sealed the design with my top coat.
Products Used:
- Orly Bonder base coat
- Nail Juice Haze
- Out the Door top coat
- Black spikes
- Dotting tool
Links:
Black spikes
Nail Juice Haze
Saturday, August 8, 2015
Jamberry - Upper Eastside
The Look:
A smart, sophisticated, and simple nail look using Jamberry's nail wraps. To get this look I started with two coats of Checkmate, a nice smooth beige, I then used the Upper Eastside Jamberry wrap on my ring finger. After the polish and wrap were dry, I then placed a black stud upon each nail using my dotting tool and a tiny bit of base coat. I then used a coat of top coat over the nail polish.
Products Used:
- Revlon Checkmate
- Jamberry Upper Eastside
- Black studs
Points to Note:
The Jamberry wrap requires heat and pressure to adhere tightly to your nail. I suggest using the baggie method with heat 2-3 times so the wrap really shrinks on to your nail.
Links:
Black studs
Upper Eastside Wraps
Jamberry Australia/New Zealand
Maureen's Jamberry Store
Youtube Tutorial
Maureen sent me these samples of Jamberry to try.
Tuesday, August 4, 2015
Nail Art - Dainty Daisies
The Look:
I saw some gorgeous looks on Pinterest and just had to try it out myself! I love how soft this look is and at the same time very glamourous with the golden studs. If you don't have studs you can also use a droplet of gold polish.
I used two coats of Lunula to get a nice creamy beige base colour. I then used a generic white polish with my dotting tool to place the petals of the flowers. I then dipped my dotting tool in a tiny bit of base coat to pick the studs up and then placed them in the middle of the flowers. The studs sunk nicely into the polish, which meant they held well throughout the day. I then placed in some 'filler petals' between the gaps of the flowers to make the overall design look more cohesive. I topped my design with one coat of top coat to smooth it out.
Products Used:
Links:
Dotting tool from Winstonia
Gold studs from Born Pretty Store
Nail Juice Polish
Out the Door top coat
Pinterest Inspiration Board
I saw some gorgeous looks on Pinterest and just had to try it out myself! I love how soft this look is and at the same time very glamourous with the golden studs. If you don't have studs you can also use a droplet of gold polish.
I used two coats of Lunula to get a nice creamy beige base colour. I then used a generic white polish with my dotting tool to place the petals of the flowers. I then dipped my dotting tool in a tiny bit of base coat to pick the studs up and then placed them in the middle of the flowers. The studs sunk nicely into the polish, which meant they held well throughout the day. I then placed in some 'filler petals' between the gaps of the flowers to make the overall design look more cohesive. I topped my design with one coat of top coat to smooth it out.
Products Used:
- Nail Juice Lunula (cream)
- Nail Juice White (white)
- Gold studs
- Dotting tool
Links:
Dotting tool from Winstonia
Gold studs from Born Pretty Store
Nail Juice Polish
Out the Door top coat
Pinterest Inspiration Board
Monday, August 3, 2015
Nail Art - Purple and Gold
The Look:
I was inspired to create a look that used glitter to create the pattern rather than nail polish. I found that I liked using glitter in this way as the shapes are more consistent than if you were to use nail polish with a dotting tool.
To start with I used two coats of High Roller as my base colour. At the base of the nail I put four golden glitters beside one another, using my dotting tool, to create a single tessellation. For the accent nail I repeated this design. I dabbed my dotting tool in a tiny bit of base coat to help with picking up the glitters. I then sealed my nail design with a coat of Out the Door top coat. I used two coats of top coat over the accent nail as the glitter is bumpy.
Products Used:
- Base colour - Revlon's High Roller from the Gel Envy range
- Top coat - Out the Door
Links:
Saturday, November 30, 2013
Nail Juice Angel and Blue Boy nail art!
I was told off by one of the young girls at daycare the other day for not wearing polish on my nails, so I decided to do something cute, quick and easy to do. I chose Nail Juice Angel as the main colour, a white jelly with pink, blue, and white glitters. Then I used Nail Juice Blue Boy on my pinkys along with a matching rhinestone. Similarly on the pointer fingers, I wore an unnamed Nail Juice also with a matching rhinestone.
You can find Blue Boy here on Etsy
Labels:
Blue,
Glitter,
Indie Brand,
Jelly,
Nail Art,
Nail Juice Polish,
Pink,
White
Wednesday, October 9, 2013
Nail Art: Retro Flowers!
I was in a bout of procrastination as well as feeling the need to try some untrieds. All three used in this mani were untrieds! Zoya Sooki, Zoya Arizona and Sephora by OPI Hi-def.
Firstly you need to paint down your base colour, I used Hi-def for this. Then I used Sooki with my dotting tool to create the outline of petals around the nails. Lastly I used Arizona for the centre of the flowers. I really loved how all of these colours looks so well together. Like they're all from the same family tree!
Link roundup
Thursday, September 12, 2013
Nail Art: White 'n Blue
Today I've got Daring Digit's Snowed In along with Butter London's Sprog! Snowed In is a white crelly with varying shades and sizes of blue glitters. Sprog is a gorgeous periwinkle creme. Sprog is used on the ring finger, topped with three different sized rhinestones.
Link roundup:
Labels:
Blue,
Butter London,
Creme,
Daring Digits,
Glitter,
Indie Brand,
Nail Art,
White
Wednesday, September 11, 2013
Nail Art: Gradient Pattern
Today's pretty manicure is made up from a base of piCture pOlish's Beige, dotted with OPI's Done Out in Deco for the purple, and Butter London's Sprog for the periwinkle, and MakeupStore's Young for the light blue.
Shown here is OPI's Done Out in Deco, Butter London's Sprog, and MakeupStore's Young.
Link roundup:
Labels:
Blue,
Butter London,
Makeup Store,
Nail Art,
Nude,
O.P.I,
piCture pOlish,
Purple
Tuesday, September 10, 2013
Nail Art: Pink Pattern!
Good morning! Today's manicure is a pretty one. All you need is Misa Pinky Promise for the base, piCture pOlish Hot Lips for the hot pink, and a dotting tool!
Butter London's Sprog is shown here because she's the newest addition to the stash. This pic is almost 100% colour accurate. I'll show you more on her tomorrow!
Link roundup:
- Purchase Misa Pinky Promise
- Review of Misa Precious Moments collection
- Purchase piCture pOlish Hot Lips
- Gradient nail art with Hot Lips
Link roundup:
- Purchase Misa Pinky Promise
- Review of Misa Precious Moments collection
- Purchase piCture pOlish Hot Lips
- Gradient nail art with Hot Lips
Thursday, September 5, 2013
Star Kin: Love Cookies & Cream
Um quite possibly one of my favourite manicures ever! Used here is OPI's Goldeneye, Star Kin's Love Cookies & Cream, and Moyou's black stamping polish, as well as some studs from Born Pretty Store.
Three coats of Love Cookies & Cream were used on pointer and pinky fingers; three coats of Goldeneye on the ring, and one coat of Moyou's black on the middle finger.
This is my other Star Kin polish, Whale Farts! Check it out here.
> BornPrettyStore <
> Moyou Nail Art <
Thursday, August 29, 2013
Nail Art: Pastel Gradient
This was a super cute gradient I did awhile back! Colours used were Misa Pinky Promise and Makeup Store's Young. The method I used to create this gradient was to use a sponge. I painted a strip of each colour on the sponge and then dabbed it along the edge of my nails to blend them together.
Thursday, August 1, 2013
Nail Art: Clouds & Smiley Faces
These are today's nails! The kids loved the faces, I was given numerous guesses as to what they were. Chicky, ducky, doggy, ticken... hehe
This manicure was inspired firstly by Nailhilism's mani, and I was dying to wear bright yellow nails. Must have needed it :)
I used a mini OPI as the yellow base, OPI's Alpine Snow for the clouds, OPI's Black Onyx for the eyes, piCture pOlish's Hot Lips for the cheeks and mouth. All I used was alternating dotting tools.
Wednesday, July 31, 2013
Nail Art: Spotty Gradient!
This is the manicure I am wearing today! I have to admit... this one was painted for little kiddies. I've noticed that they love to count things and to call out colour's names. So! I made a manicure just for them! One sweetie counted 3 dots on one hand and 16 on the other hehe :)
The base colour is OPI's Skull & Glossbones, the pink is piCture pOlish's Hot Lips, and the yellow is a mini OPI. I just used two different sized dotting tools to achieve this look, very simple and easy!
Tuesday, July 30, 2013
Blog Fest 2013 Voting now Open!
Voting for piCture pOlishes Blog Fest 2013 is now open!
If you liked the way I used Hot Lips, Marine, and Beige, pop the words 'Nail Juice' in to the comments section here:
Monday, July 29, 2013
piCture pOlish Blog Fest 2013 - Celebrating the Year of the Blogger!
pIcture pOlish put together a Blog Fest for 2013, which meant that they sent you three colours to use and you had to create some nail art with them! The colours I was sent were Hot Lips, a beautiful searing fuchsia, Marine, a decadent teal creme, and Beige, a picture perfect nude.
At first I was a little bit stumped with how my three could work together as they were so different from one another! I had a nude, a neon and a teal! But the secret was to actually combine them. And by that I mean to mix the smallest amount of Marine in to a dab of Hot Lips to create different shades from thin one another. I also used tiny amounts of black to darken Hot Lips, and the more purpley Hot Lips for the middles of the flowers.
I have to say, Hot Lips is high on my top 20 list of fave polishes. She's just so bright it's impossible to feel sad when looking at that beautiful pink on your polished nails. I have worn it so many times, I couldn't wait to use it in this manicure!
So in order to create this manicure follow these steps:
- Paint two thin coats of Beige to create the base colour.
- For the fingers that you wish to gradient, paint a thin line of Hot Lips on the tips of these fingers.
- Once dry, paint a blob of Beige and Hot Lips together on a sponge.
- Dab the sponge in the middle of the thin Hot Lips line and the Beige nail.
- Repeat to get a smoother blend.
- For the fingers with flowers, use a small paint brush to paint the flowers in Hot Lips.
- Use Marine for the leaves of the flowers.
- Add a tiny amount of black to Hot Lips to create the darker inside of the flower.
- Top coat your beautiful creation, you're done!
Blog Fest Awards!
If you liked my design, pop 'Nail Juice' in to the comments section here:
https://www.picturepolish.com.au/index.php?route=information%2Finformation&information_id=10
Check out all nail art posts here!
pOlish On-line Store Facebook Twitter Pinterest Instagram
https://www.picturepolish.com.au/index.php?route=information%2Finformation&information_id=10
Check out all nail art posts here!
pOlish On-line Store Facebook Twitter Pinterest Instagram
Subscribe to:
Posts (Atom)